The import function for chromosome mapping can be used in two main ways: bulk import of matches from testing companies, and setting up custom maps using data assembled in a spreadsheet.
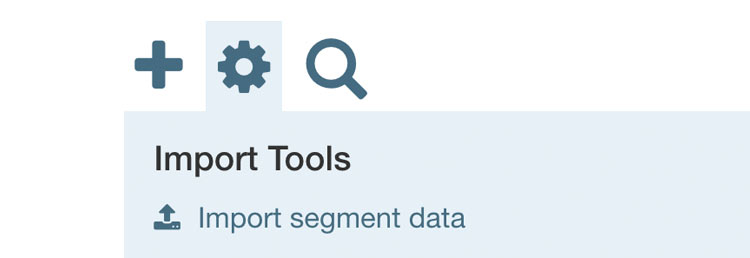
To reach the import function, go into any of your chromosome maps, click on the 'settings' button above the chromosomes, and click 'Import segment data'. If you haven't yet created a map, you can click here to do so.
Please note: in order to use the import functionality you will need an active DNA Painter subscription.
The instructions below also appear on the import overlay:
Step 1: Get your file
You can import the file of segment data that is provided by your DNA Testing company, or a DNA painter CSV file, and the site will recognize the format.
Important: this is not your raw DNA file; it's a file containing the coordinates for each segment you share with your matches. Please read on for more info!The instructions differ for each testing company. In all cases you will need to save the file to your computer as opposed to opening it.
- Family Tree DNA
The file is available via the button 'Download All Segments' in the ftDNA chromosome browser. The button is at the top right of the page above the list of matches. Please note that if you transferred to ftDNA, you'll need to unlock their chromosome browser before you can download your data.
- 23andme
Segment data is currently unavailable from 23andMe Read more
- MyHeritage
Bulk segment data is currently unavailable from MyHeritage This page will be updated once this feature is restored.
- Gedmatch
Gedmatch now provides a downloadable file of all segments via their 'Segment Search' report (please note: this is available to Gedmatch Tier 1 subscribers only).

This CSV can be imported directly into DNA Painter.
Or alternatively you can copy and paste the table of segments provided into a CSV format. To do this:
- Log into Gedmatch and run the Tier 1 matching segment search on the relevant kit.
- Once the results have loaded, copy and paste the entire page (CTRL/⌘-A to select, CTRL/⌘-C to copy, CTRL/⌘-V to paste) into a spreadsheet (or Google sheet)
- Delete the top 20 or so lines of the file, leaving the line with 'Kit, Chr, Start Position, End Position, cM, SNPs, Name, Sex, Email' as the header row
- Save this as a comma-separated-values (CSV) file and DNA Painter will recognise the format.
- Please note: the content of the 'Kit', 'Sex' and 'Email' fields will be appended to the notes on imported segments
Tip: if you have a parent tested and uploaded to Gedmatch, you can run the 'Phasing' tool to create separate kits of your maternal and paternal DNA. And if you then run the segment search using these phased kit numbers, you'll be able to import your maternal and paternal DNA separately and assign the matches to the correct chromosomes by editing the imported groups!
Importing a DNA painter map To download a CSV file from a DNA Painter map, visit 'All segment data' (click the settings cog icon above chromosome 1 and you'll find it under 'Reports') and click the '.csv file' link at the top left.
Or if you prefer, you can import a custom file of segments that you create. Files for import need to be in CSV format.
To create your own file, please use this template, with the header row intact.
The template is in comma-separated-values (CSV) format, and can be filled out in a spreadsheet programme (e.g. Excel or Google Docs), or in a text editor. For instructions on how to correctly open a CSV file in Microsoft Excel, please see this page. Please ensure the file you upload retains the CSV format. If you use a text editor, you will need to make sure you don't use commas in the data you enter in for each field.
Fields marked with an asterisk (*) are compulsory:
- Chr * This field should contain the chromosome number (it can be preceded by 'chr')
- Start * This field should contain the start position for the segment
- End * This field should contain the end position for the segment
- cM This field should contain the number of centimorgans shared
- SNPs This field should contain the number of SNPs in the segment
- Match This field should contain the name of the person with whom you share this segment (if not provided, this will appear as 'not specified').
- Confidence This field should contain a number between 1 and 4 that measures how confident you are in your identification of this match (1 is the lowest and 4 is the highest. Segments with a lower certainty level display in a more transparent shade) (if not provided, this will appear as '3').
- Group This field should contain the the name of the group into which you want this segment to be placed (if not provided, the segment will be put in a generic group named according to the filename).
- SideThis field should contain 'maternal' if you want to paint the segment on your maternal chromosome or 'paternal' if you want to paint it on your paternal chromosome, or 'both' if you are uncertain (if not specified, the group will be 'unknown or both').
- Notes This field should contain any notes you have on the segment.
- ColourThis field should contain a colour for the group. This can be a hex code or a named colour (if not specified, a colour will be chosen at random).
- AncestorThis is an optional column that you can add if you want to indicate if a group refers to a known ancestor as opposed to a general grouping of segments. Enter a value of 1 if the group is a known ancestor. (if not provided, the group will be set to 'not a known ancestor')
Note: 'Colour' is used only if you have specified a side or new group name for the first time. If you have multiple segments in a new group, the values for 'side', 'colour' and 'ancestor' from the first instance of that name will be used.
If you don't have data for a column/value, don't delete it - just leave it blank.
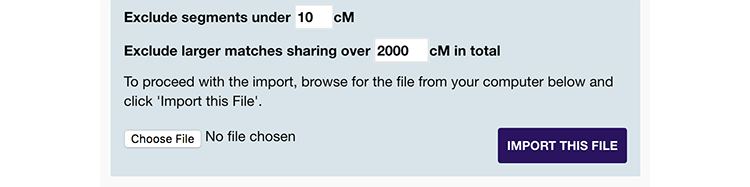
Step 2: Import the file into DNA Painter
Once you have your file, you can upload it in the area on the right of the import overlay.
Additional notes
- Matches imported from a ftDNA/Gedmatch/MyHeritage export will not be sorted into maternal or paternal (hence will not count towards the % completed). If you have a parent or known maternal/paternal relatives tested at FTDNA, there is a tool that lets you upload an additional file to help sort this. And for matches from any other company, you can use the Bucketing tool to help sort your matches using the match or segment lists of known relatives.
- This process is likely to add a significant number of segments to your map - from the low hundreds to several thousand, depending on the number of matches you have. This is likely to slow your map down.
- By default, the site will exclude close matches with more than 2,000cM shared (raise this limit to include these). It will also exclude any matches you've uploaded before from this testing company, provided you leave the original name intact.